Mint NFTs from Shopify Orders
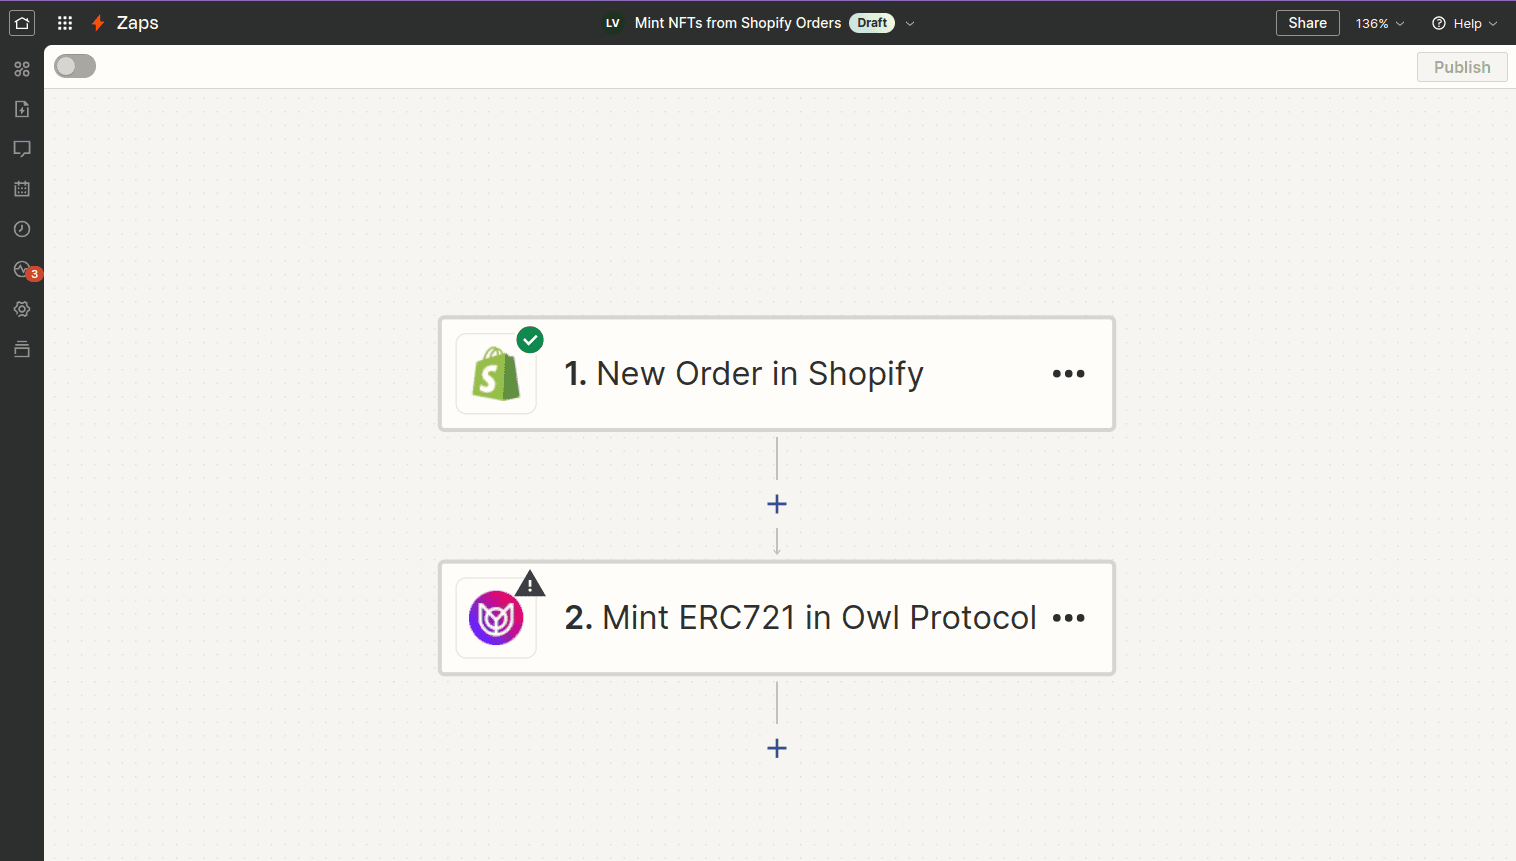
In this tutorial, we'll setup a no-code automation using the Owl Zapier App (opens in a new tab) to mint an NFT whenever someone makes a purchase on Shopify
Prerequisites
Before you begin you should have the following
- Create an Owl Protocol project at owl.build (opens in a new tab) and get an API Key
- Deploy An ERC721 Collection on that project
- Create an account on Zapier (opens in a new tab)
- Create a store on Shopify (opens in a new tab). We recommend following this guide (opens in a new tab) to create a development store with sample data
Test Purchases with Development Store
- On the shopify admin dashboard (
https://admin.shopify.com/store/<store-domain>), go to "Online Store > Preferences > Restrict store access" to find your store password - Go to your store (
https://<store-domain>.myshopify.com) and use1as the credit card number with a future date of expiry and any 3 numbers for CVV
- Make a sample purchase on your store with your email
Steps
Zapier Template
TODO Get Template for Owl Protocol x Shopify
Create a Zap using our one-click template (opens in a new tab) for Shopify & Owl Protocol Zaps. You will now configure your Zap from within the Zapier Editor

Configure the Shopify Trigger
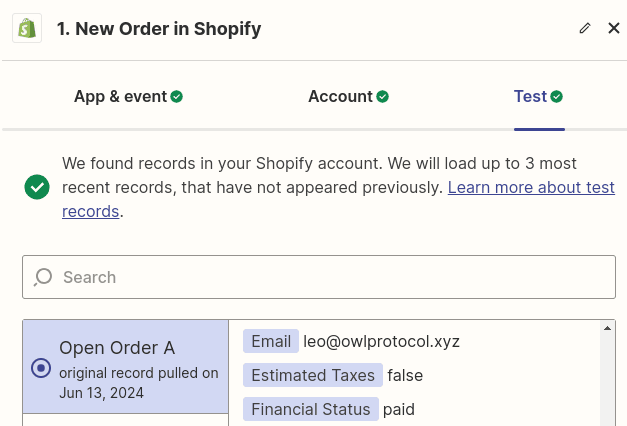
Click on New Order in Shopify box to configure the Zap Trigger.
- Account: Connect your Shopify Account with Zapier using your Shopify store username
- App & Event: Set the Event to "New Order"
- Test: The Zap Trigger should have collected the sample order with your email as Email (see Prerequisites)

Configure the Owl Protocol Action
To use Zapier with multiple Owl Protocol projects, you can connect new accounts to Zapier using each project's API Key. You can also rename connections to match your project name to easily identify them.
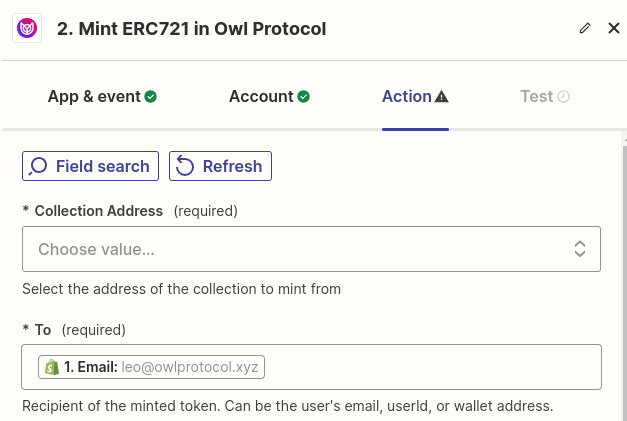
Click on Mint ERC721 in Owl Protocol box to configure the Zap Action.
- Account: Connect your Owl Protocol Account with Zapier by pasting your API Key
- App & Event: Set the Event to "Mint ERC721"
- Action: Configure the action parameters
- Collection Address: If you have already deployed a collection, you will see the names and addresses of these collections in the dropdown. If not, first Deploy An ERC721 Collection.
- To: Use the Email output from the Shopify Order. This way, NFTs will be sent to anyone who makes a purchase on your store.
- Token Template ID (optional): If you have previously created Templates, they will appear in the dropdown. If not, you can skip this.
- Name (optional)
- Description (optional)
- Image (optional)
- Attributes (optional)
- Test: The Shopif Order Trigger should have passed down the order info, and testing the Owl Action should mint a new ERC721 successfully

Publish your Zap
After testing the Zap, publish your Zap. While it is on, it will mint an ERC721 from the selected collection to the purchaser's email for every new order.

Workflow Recap
By following this guide, you have successfully set up an automated workflow that mints NFTs whenever someone makes a purchase on Shopify
Additional Tips
- Troubleshooting: If your Shopify orders are not triggering the Zap, double-check that the store is properly accessible by Zapier.
- Customization: Fill in fields such as name, image, and attributes to personalize the NFTs. You can also create Token Templates in the Owl Protocol Dashboard to further customize the NFTs to meet your specific needs.
Next Steps
Explore the wide range of apps available on Zapier and experiment with Owl Protocol. Develop your own workflows to meet your specific needs, and discover creative ways to automate and enhance your Web3 experience.